Know which tool is on which machine without asking
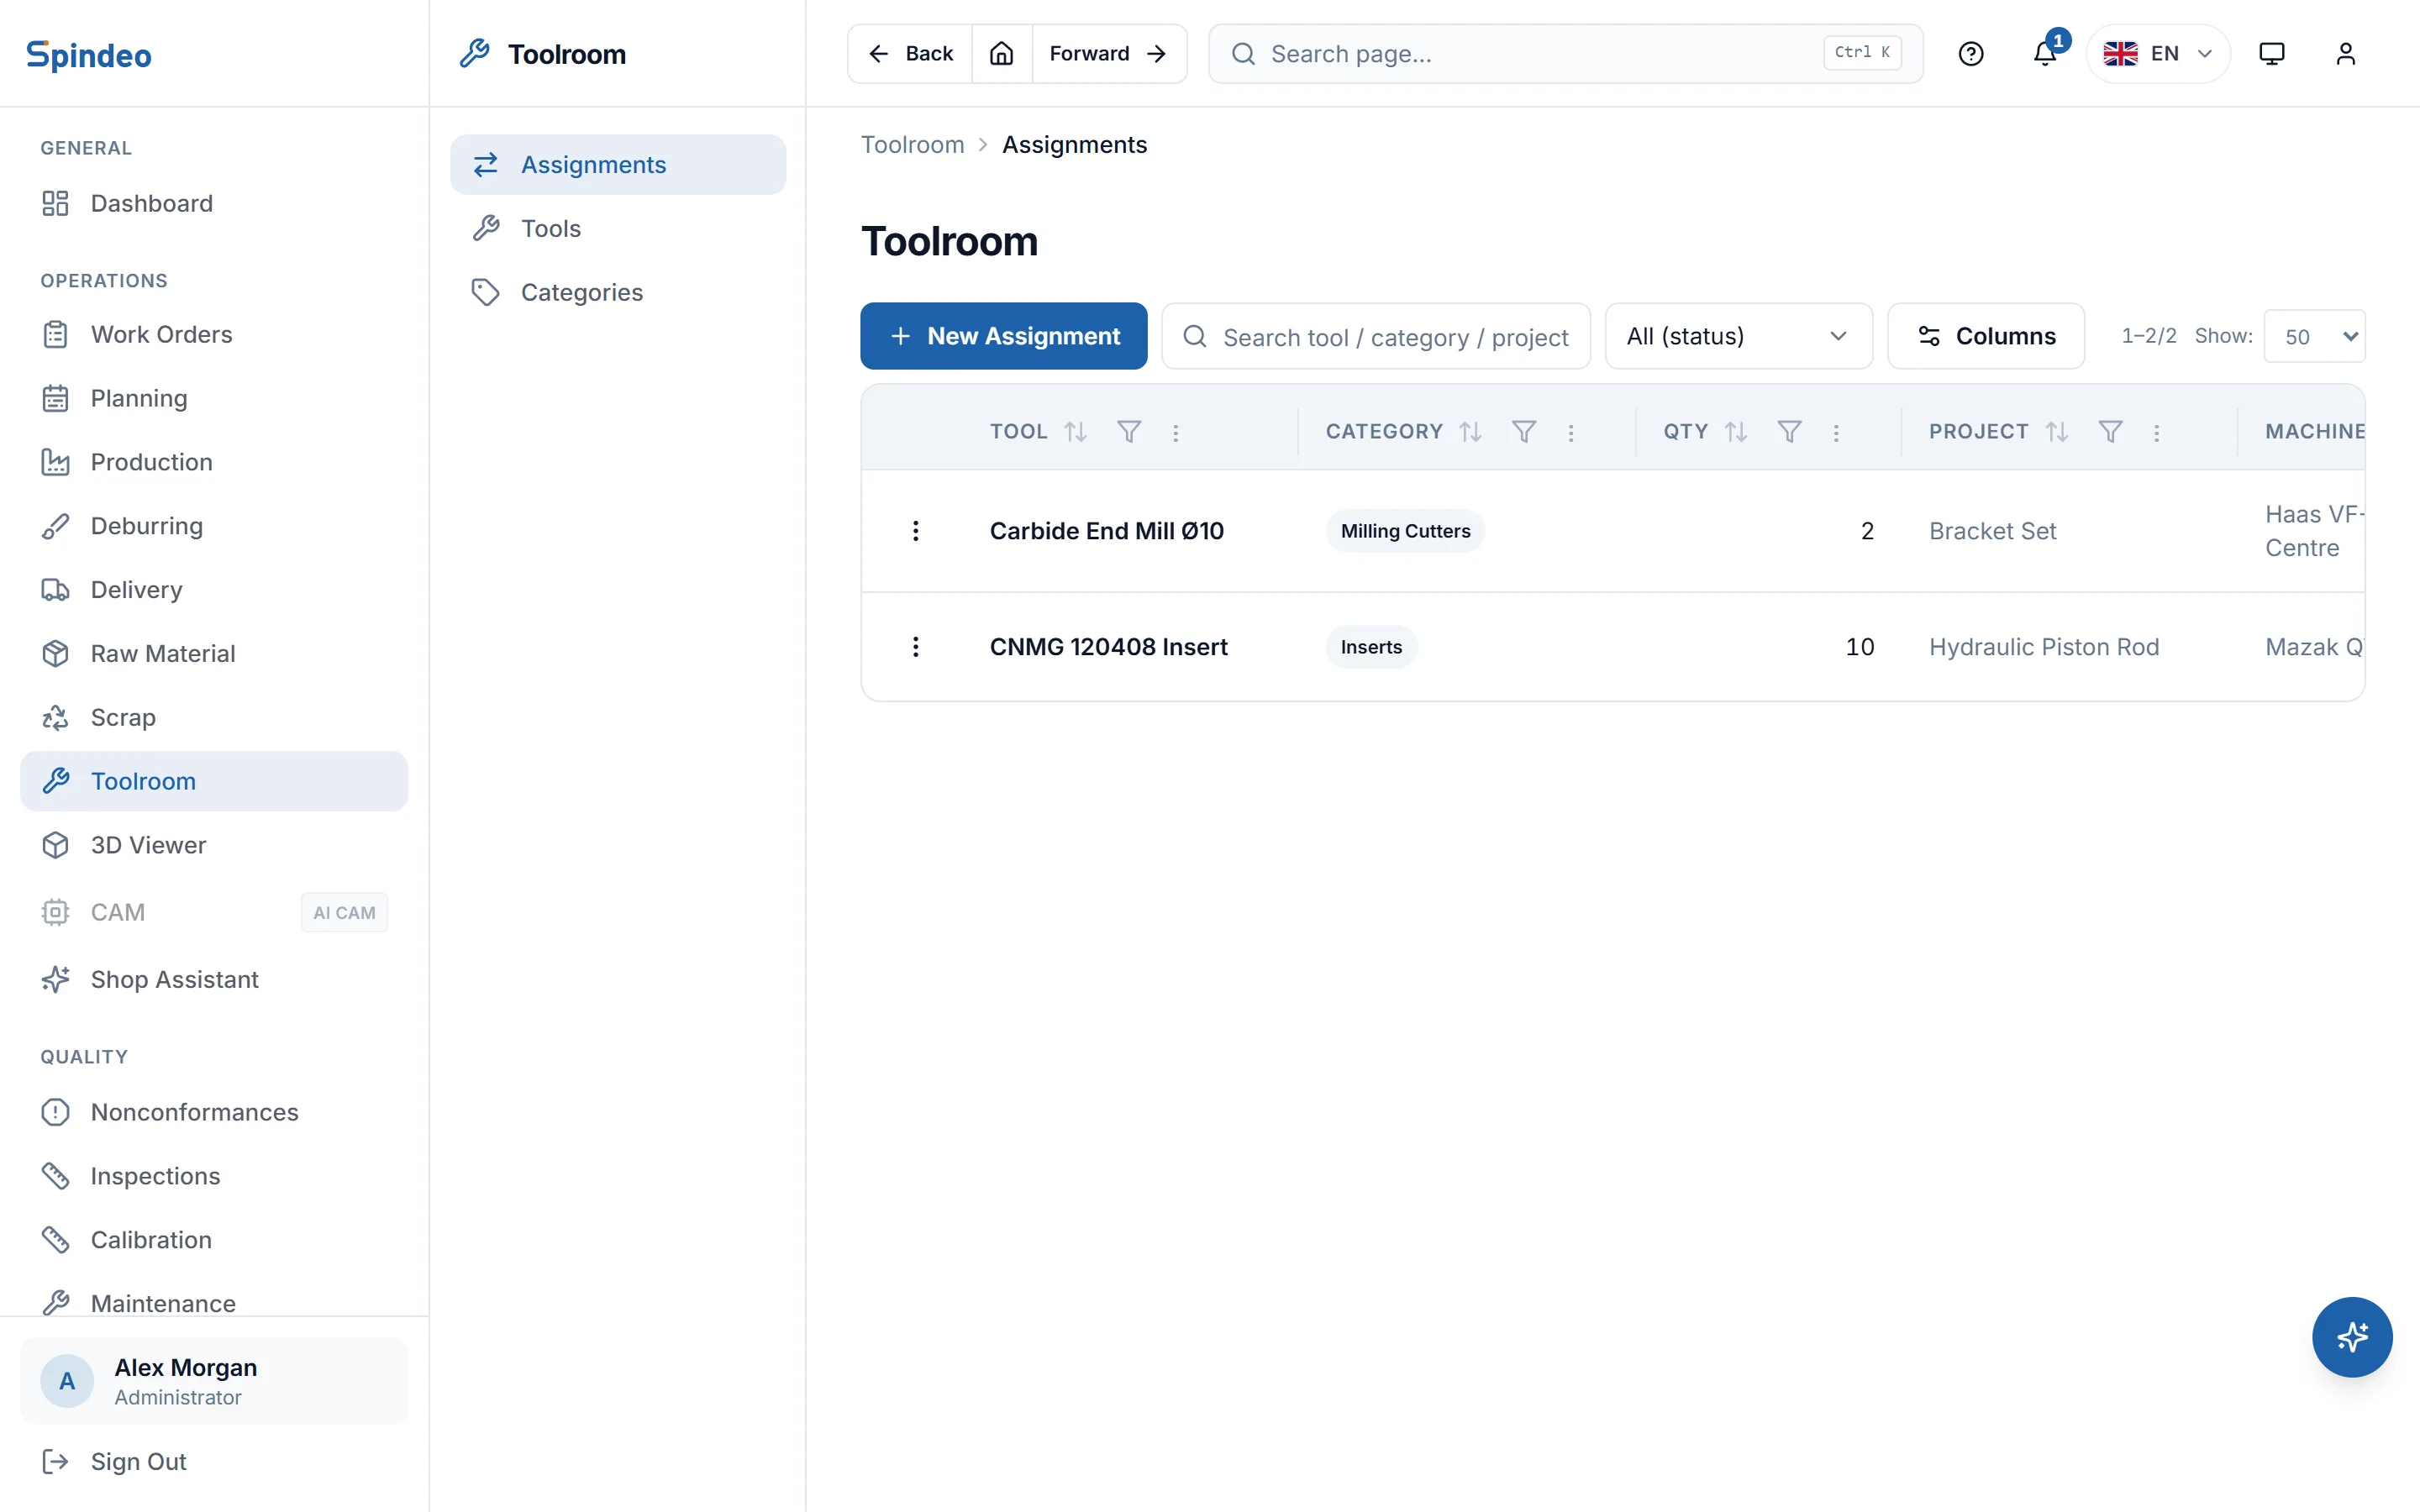
You list inserts, end mills and other tools by category. When you hand a tool to a machine, the quantity, project and date are recorded, and it shows as checked out until it is returned. Each machine's page lists the tools currently on it.
How it works
- 1
Define categories and tools
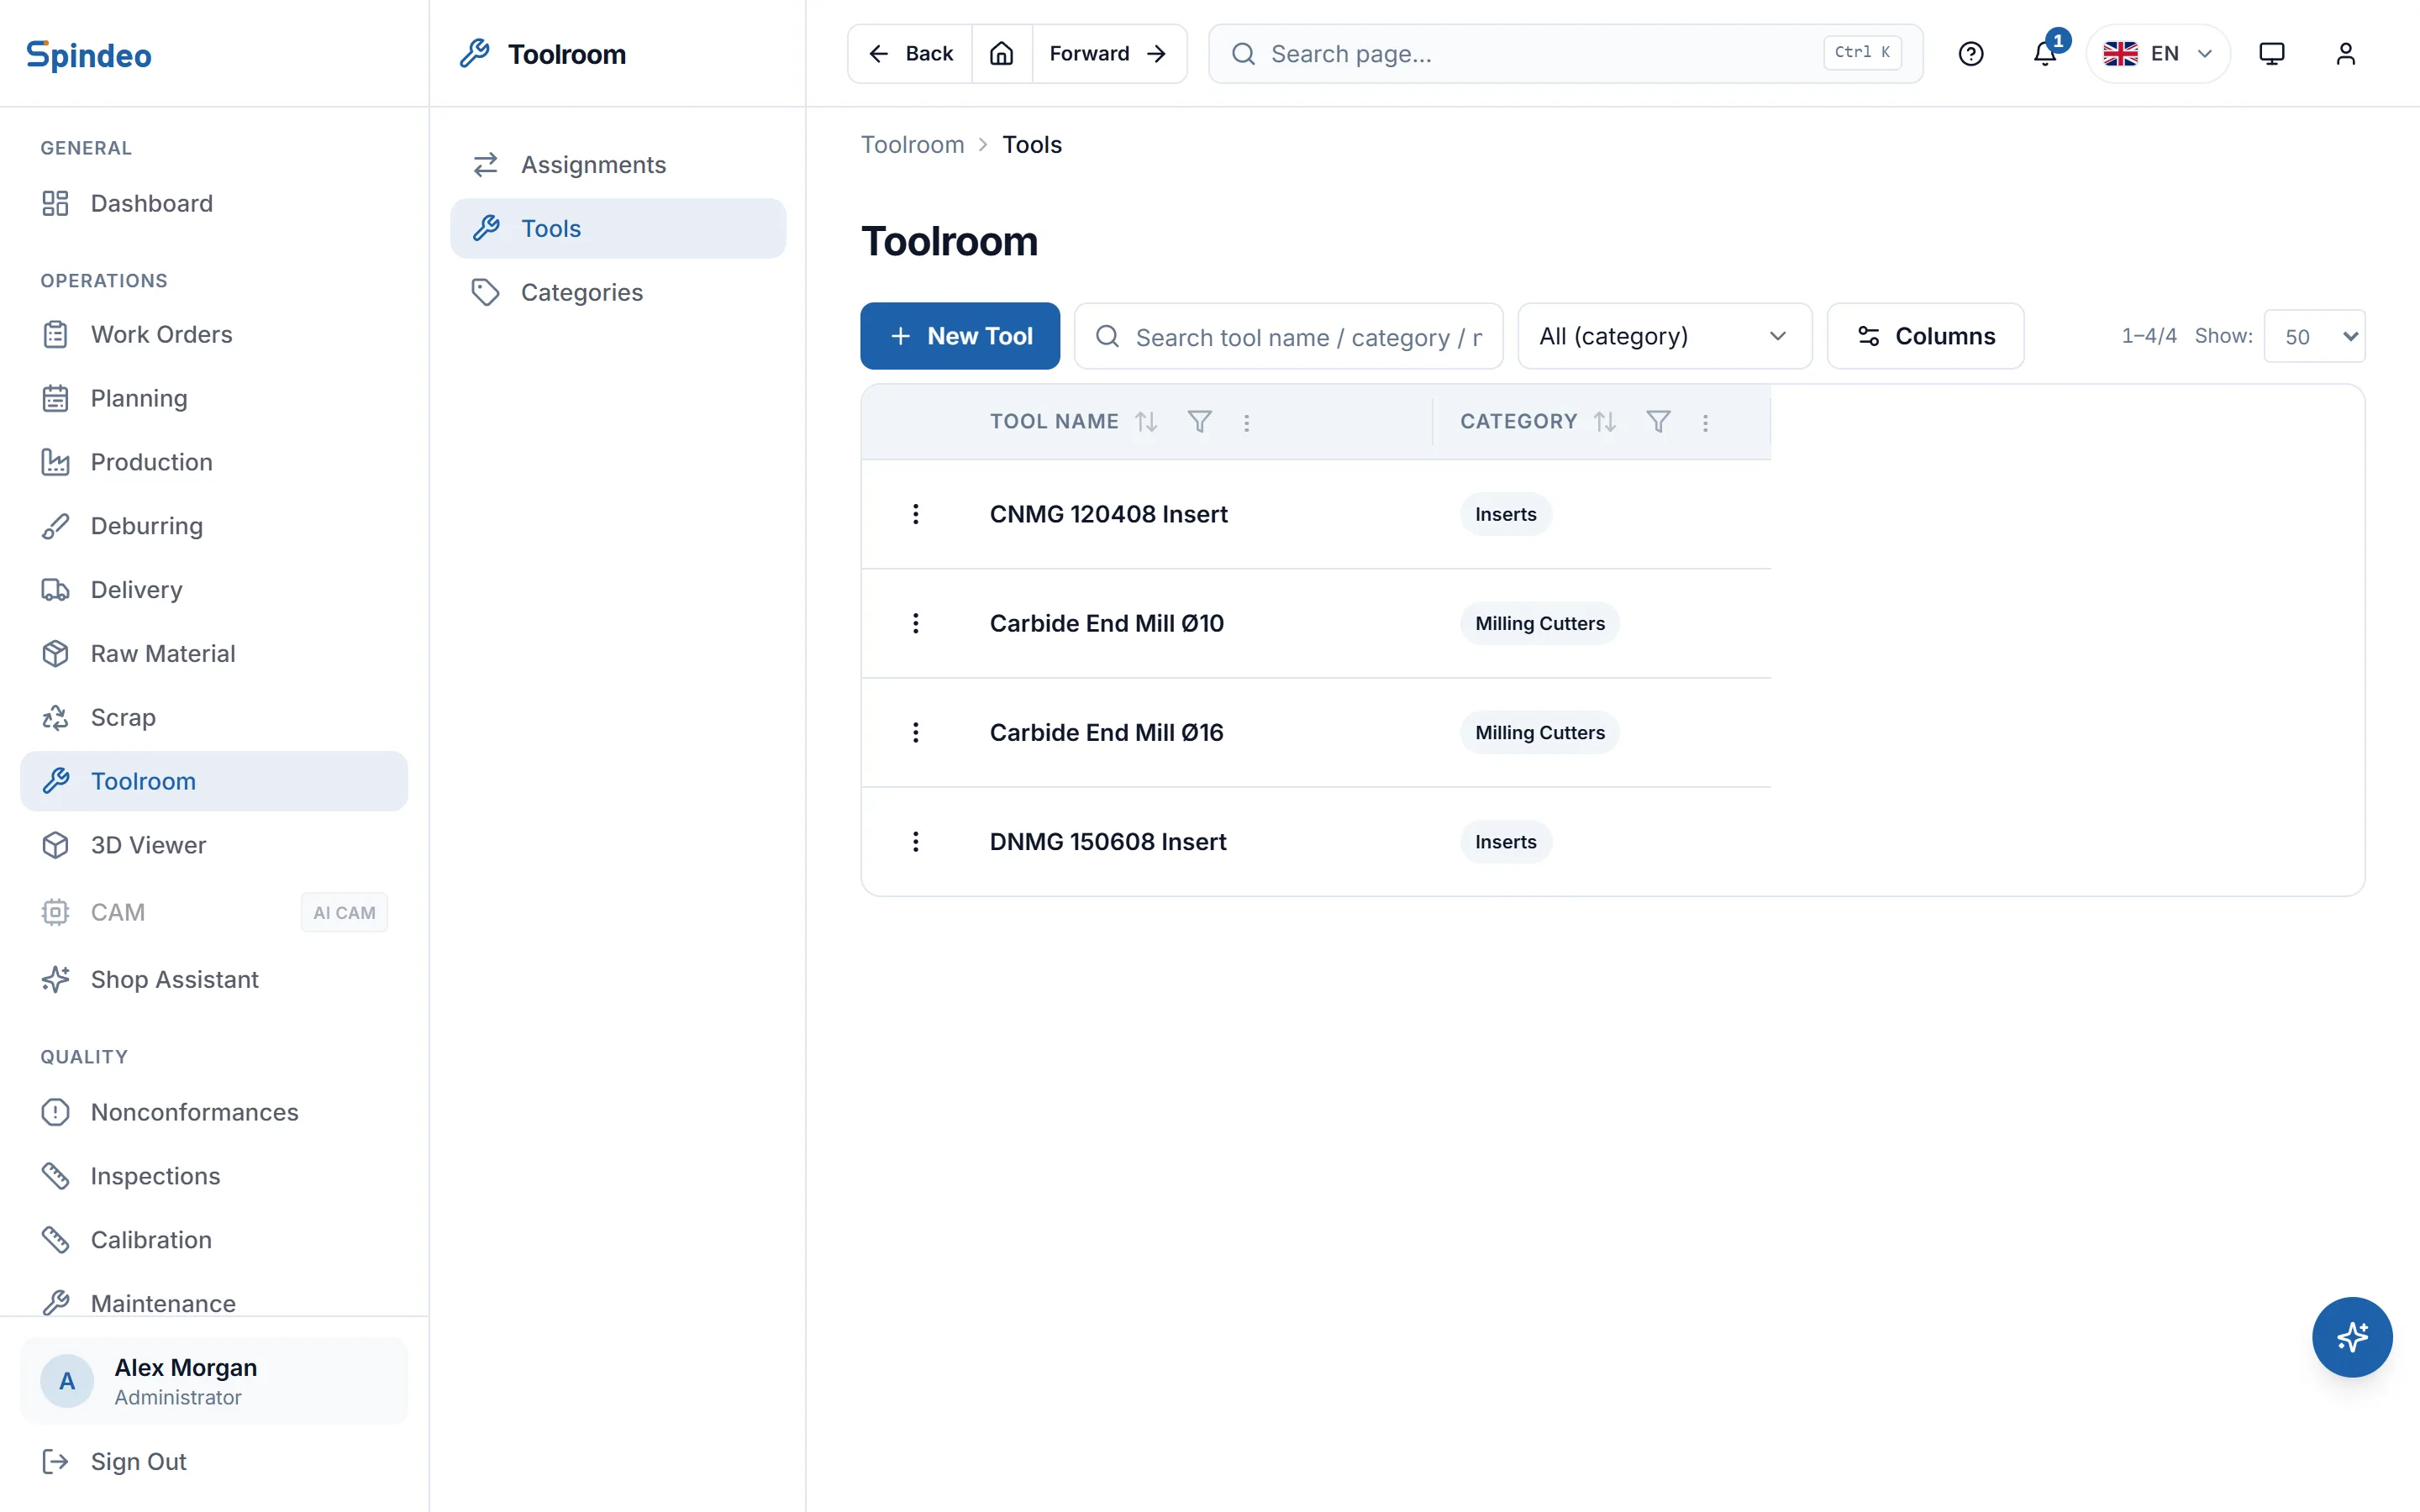
On the Categories tab you set up tool classes: inserts, milling cutters, drills. On the Tools tab you type each tool's name and pick its category.
- 2
Issue the tool to a machine
On the Assignments tab you pick the tool from the list or type its name, then enter the quantity, machine, project and issue date. As long as the return date is empty, the tool shows as checked out.
- 3
Record the return
When the tool comes back you enter the return date on the assignment. Filter the list by checked out or returned, and you see at a glance what is out on the floor.
What's included
Tool list by category
Tools sit under their categories. You filter the list by category and search by tool name.
Assigned to a machine and a project
Every assignment is written to one machine and one project, so you can later find which tool was used on which job.
Checked out or returned
Any assignment without a return date carries a checked out label. You do not have to walk the toolroom to find what has not come back.
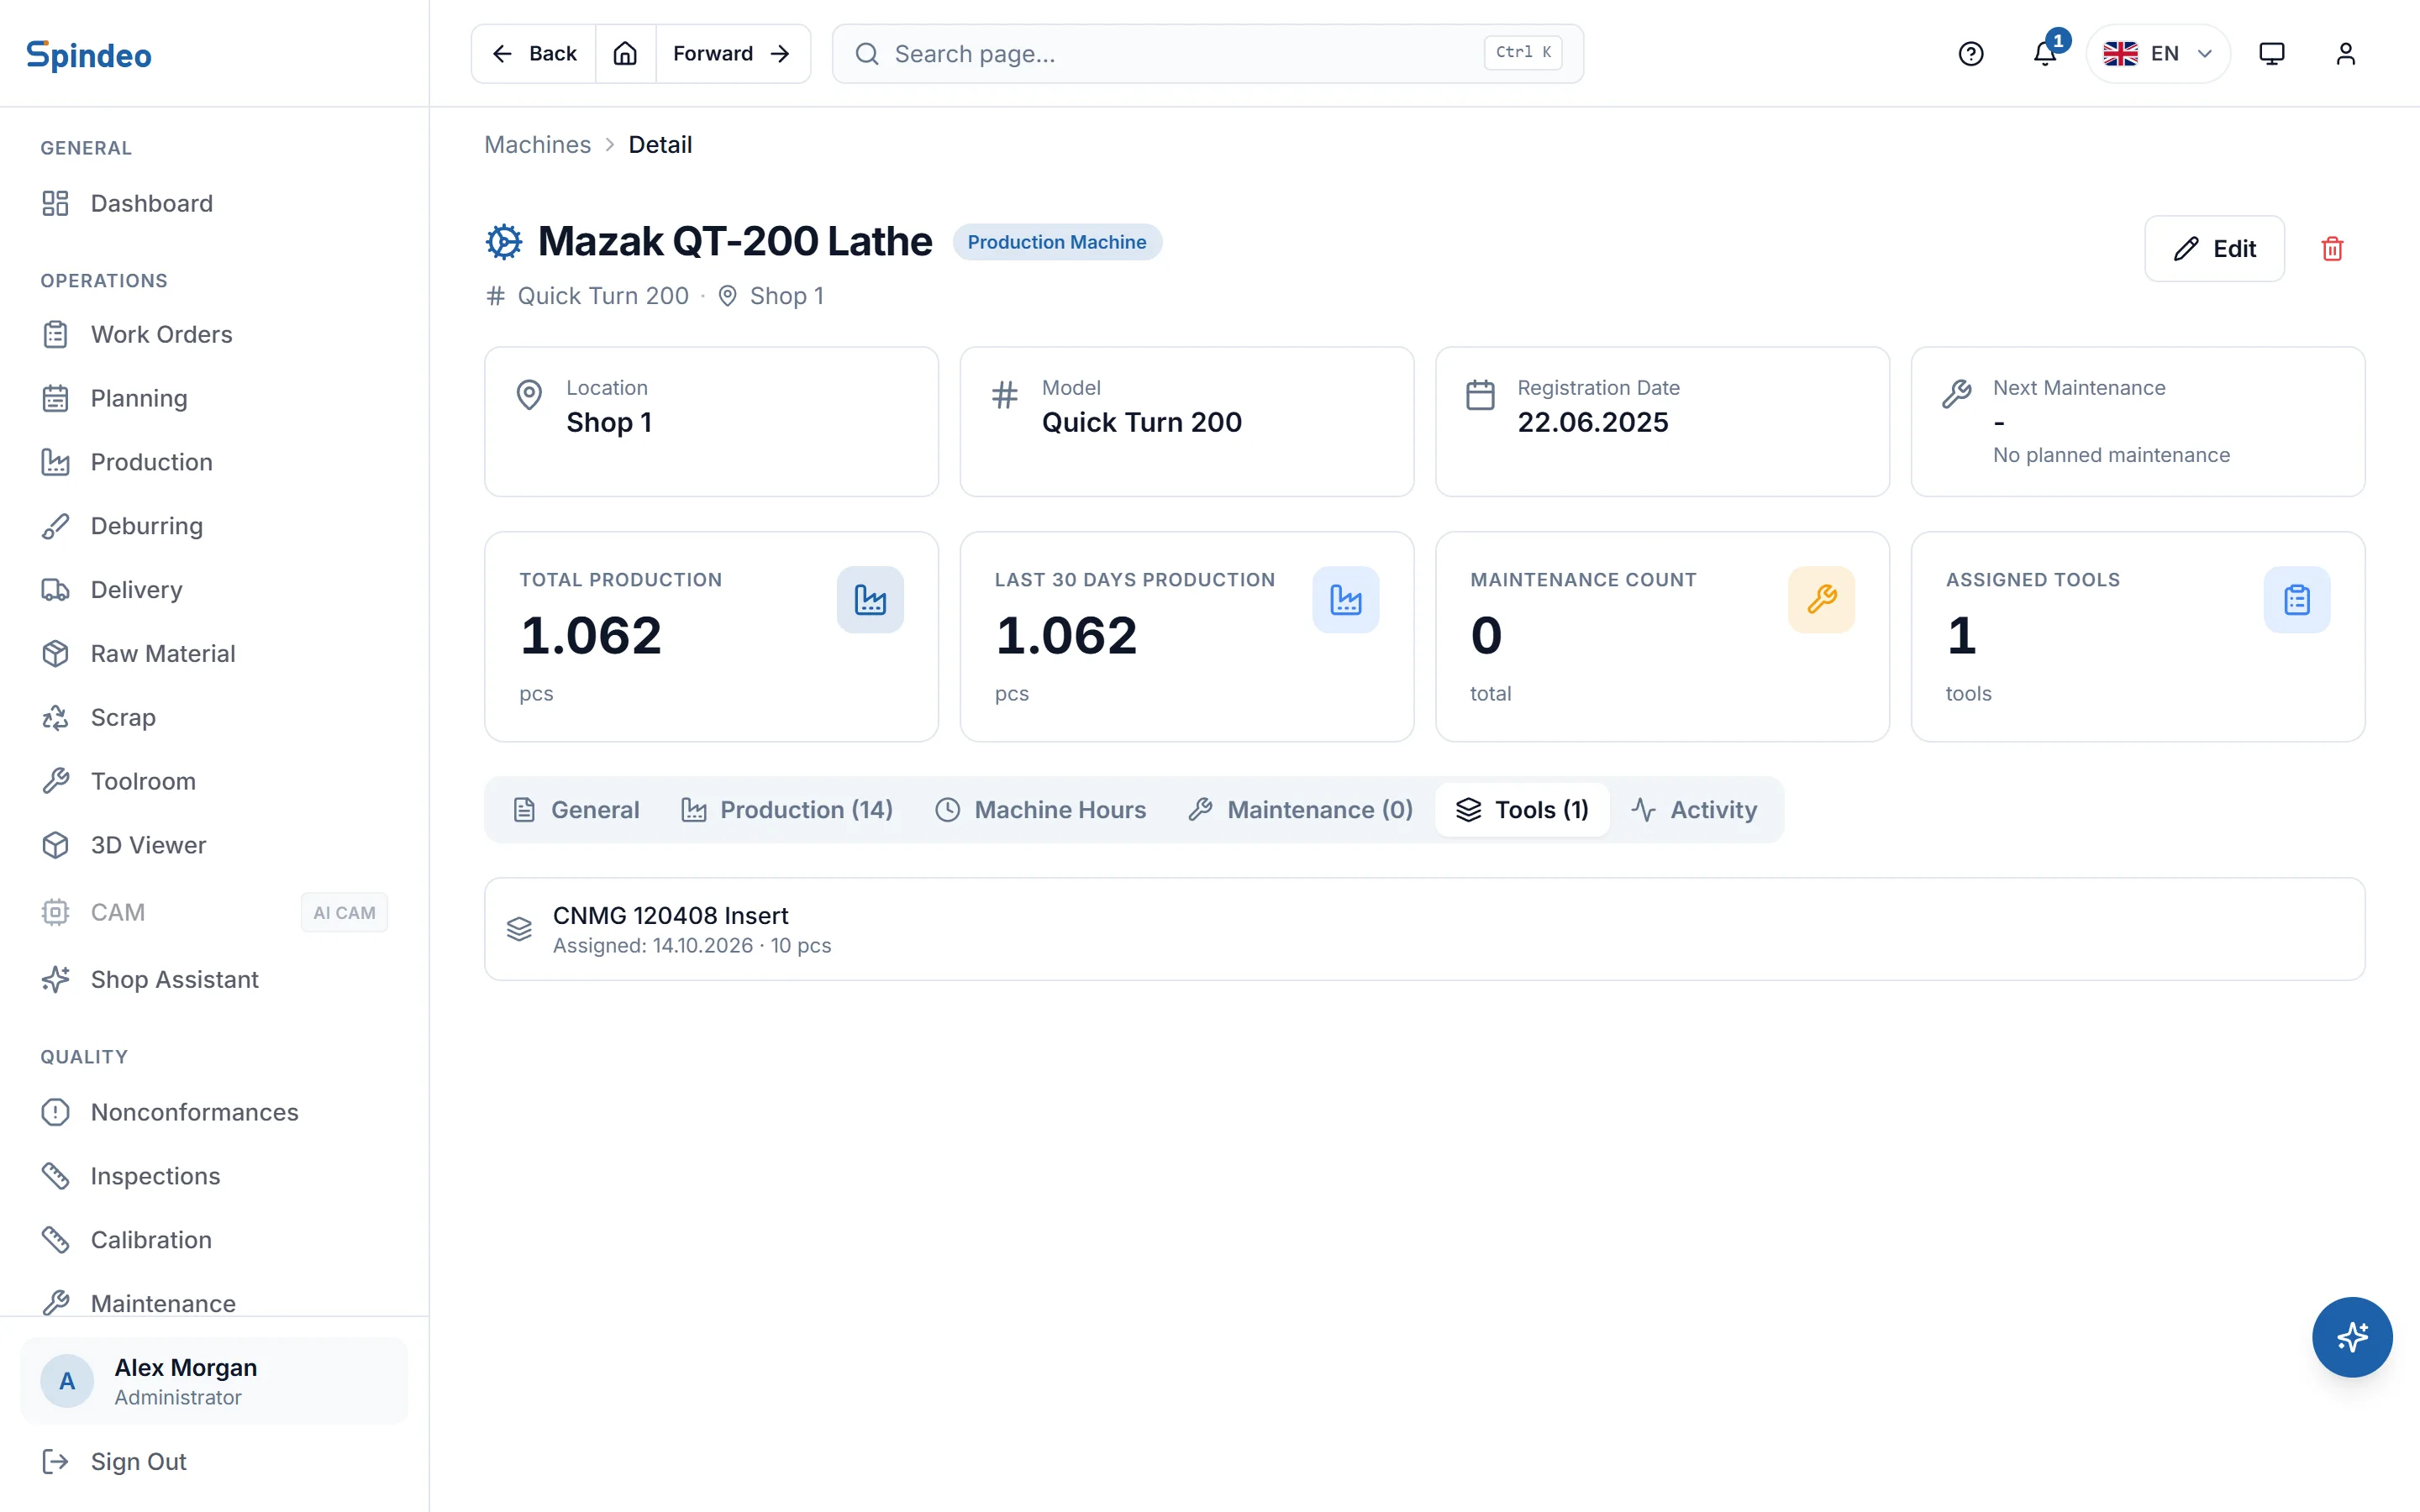
Tools on the machine's page
A machine's own page lists the tools issued to it and not yet returned, with quantity and date.
Issue tools that are not listed yet
If a tool is not in the list yet, typing its name on the assignment is enough. The job does not wait for someone to set up the tool first.
Notes and search
You add a note to an assignment, such as who took it or an insert change. Assignments are searchable by tool, category, project, machine and note.
Frequently asked questions
Try it in your own workshop
After you sign up you can open the sample workshop: browse the screens on this page in your own browser, then switch to your own data.